Navigate to Playlist Schedule. Select your jukebox.
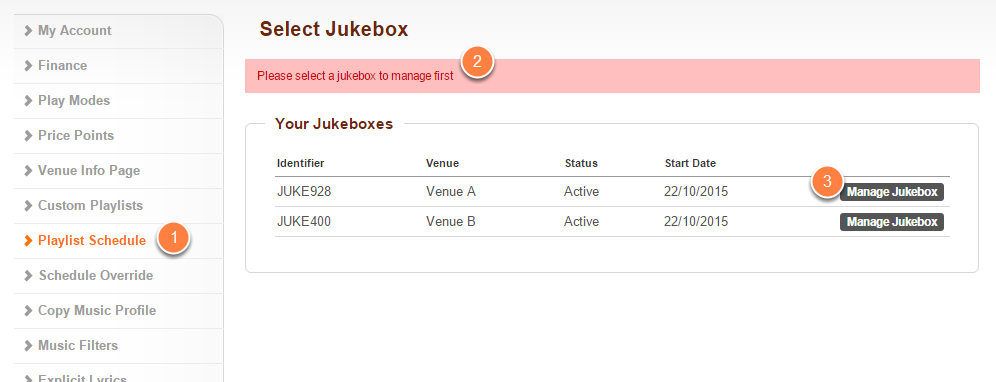
- Click on Playlist Schedule located on the left-hand navigation menu.
- If you do not have your jukebox selected already, then you will be prompted to select the jukebox you would like to manage.
- Do this by clicking on the appropriate Manage Jukebox button.
View your Playlist Schedule.
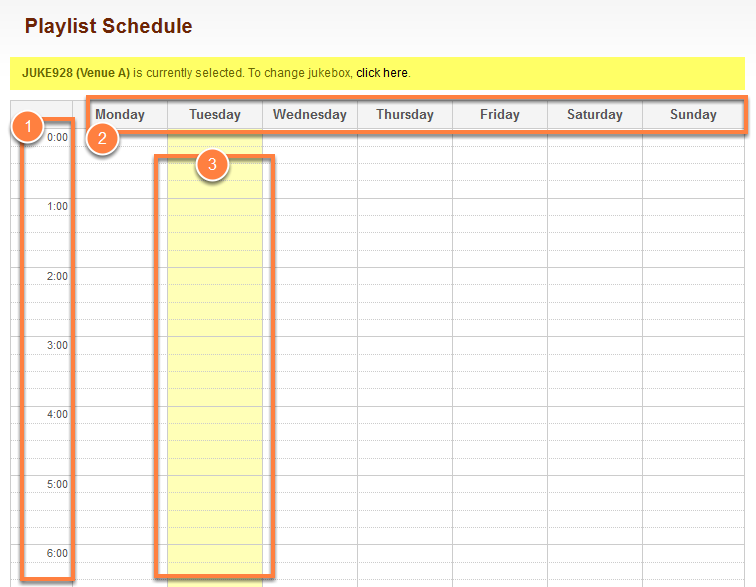
By default, the schedule will be blank and the Default Playlist will be playing (see the Default Playlist section which follows after this point for more information).
Once you are on the Playlist Schedule screen, you will see:
- The times of the day as row headers
- The days of the week as column headers
- Current day of the week will be highlighted in yellow
Default Playlist.
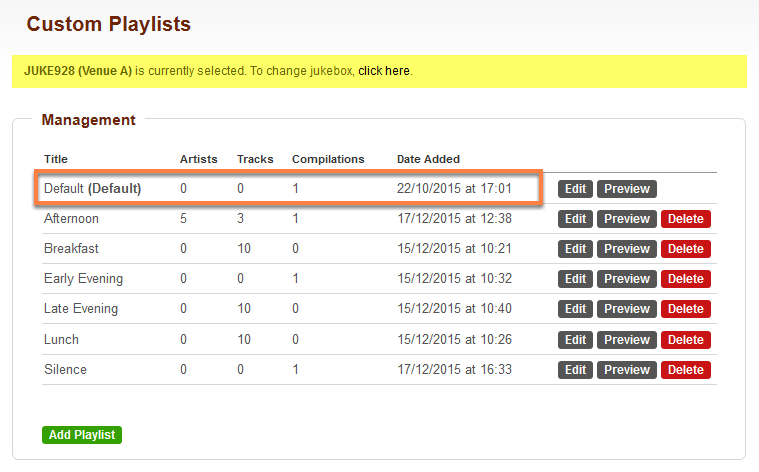
It is worthwhile noting that, if no playlist is scheduled, the playlist marked 'Default' in your Custom Playlists page will be used.
Plan your schedule.
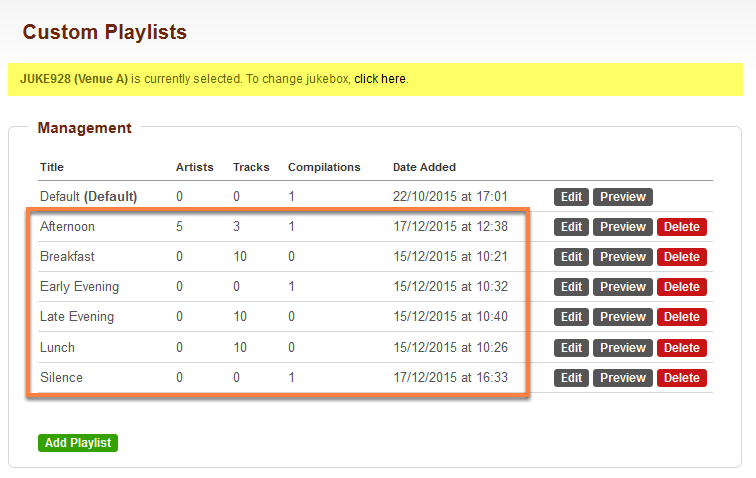
For purposes of this demo we will be creating the following playlist schedule:
This will be the same for each day of the week from Monday until Sunday.
- Breakfast Playlist - playing from 07h00 until 12h00
- Lunch Playlist - playing from 12h00 until 14h00
- Afternoon Playlist - playing from 14h00 until 17h00
- Early Evening Playlist - playing from 17h00 until 20h00
- Late Evening Playlist - playing from 20h00 until 23h00
- No music will be playing from 23h00 until 07h00 the next morning
Create your first Schedule Block.
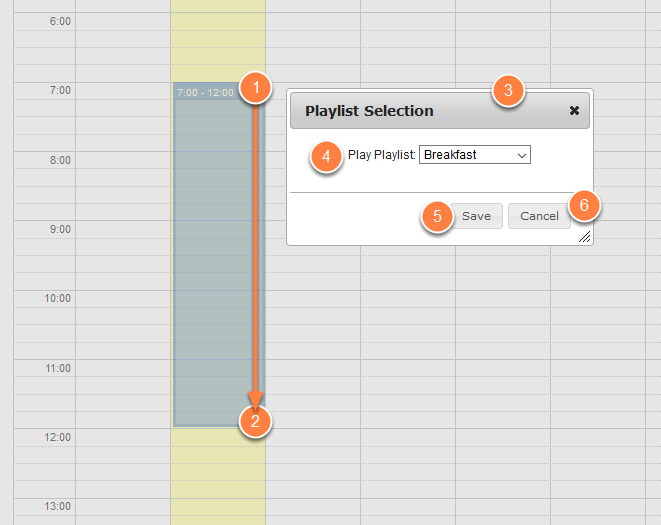
To schedule a playlist;
- Click your cursor on the day and time that you would like the playlist to start playing.
- Drag your cursor down to the point that you would like the playlist to stop playing.
- When you release your cursor a Playlist Selection window will pop-up.
- Select your playlist from the Play Playlist drop-down.
- Click Save if you are happy with your changes.
- Click Cancel if you do not wish to continue creating the Schedule Block.
Increasing/Decreasing a Schedule Block.
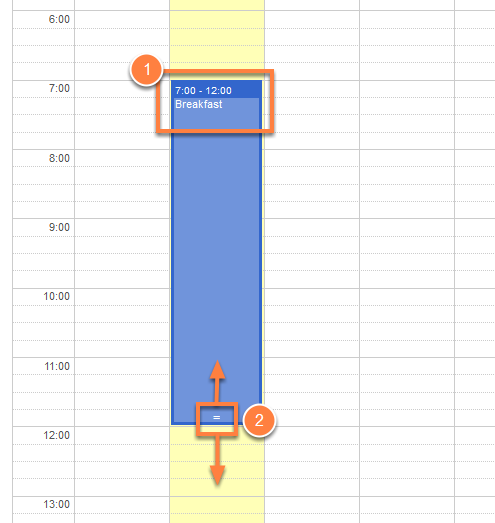
- Your Schedule Block has now been created and you can see the time as well as the name of the playlist inside of the Schedule Block.
- To increase or decrease the length of a Schedule Block, drag the bottom of the block up or down to change its end time.
Moving a Schedule Block.
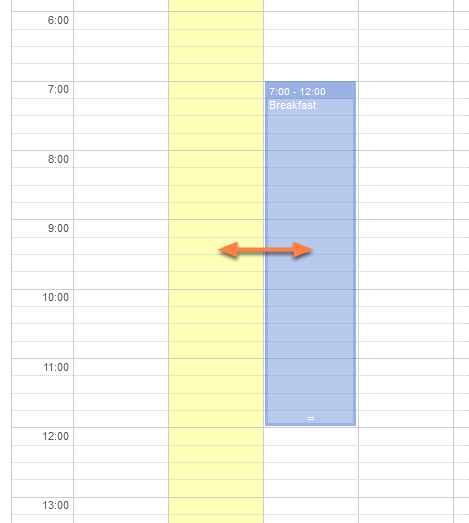
To move a Schedule Block simply click on it and drag it to another location. Ensure that it does not overlap another Schedule Block or run outside of the day, this will cause the Schedule Block to move back to its original position.
Continue with your Playlist Schedule to complete your request.
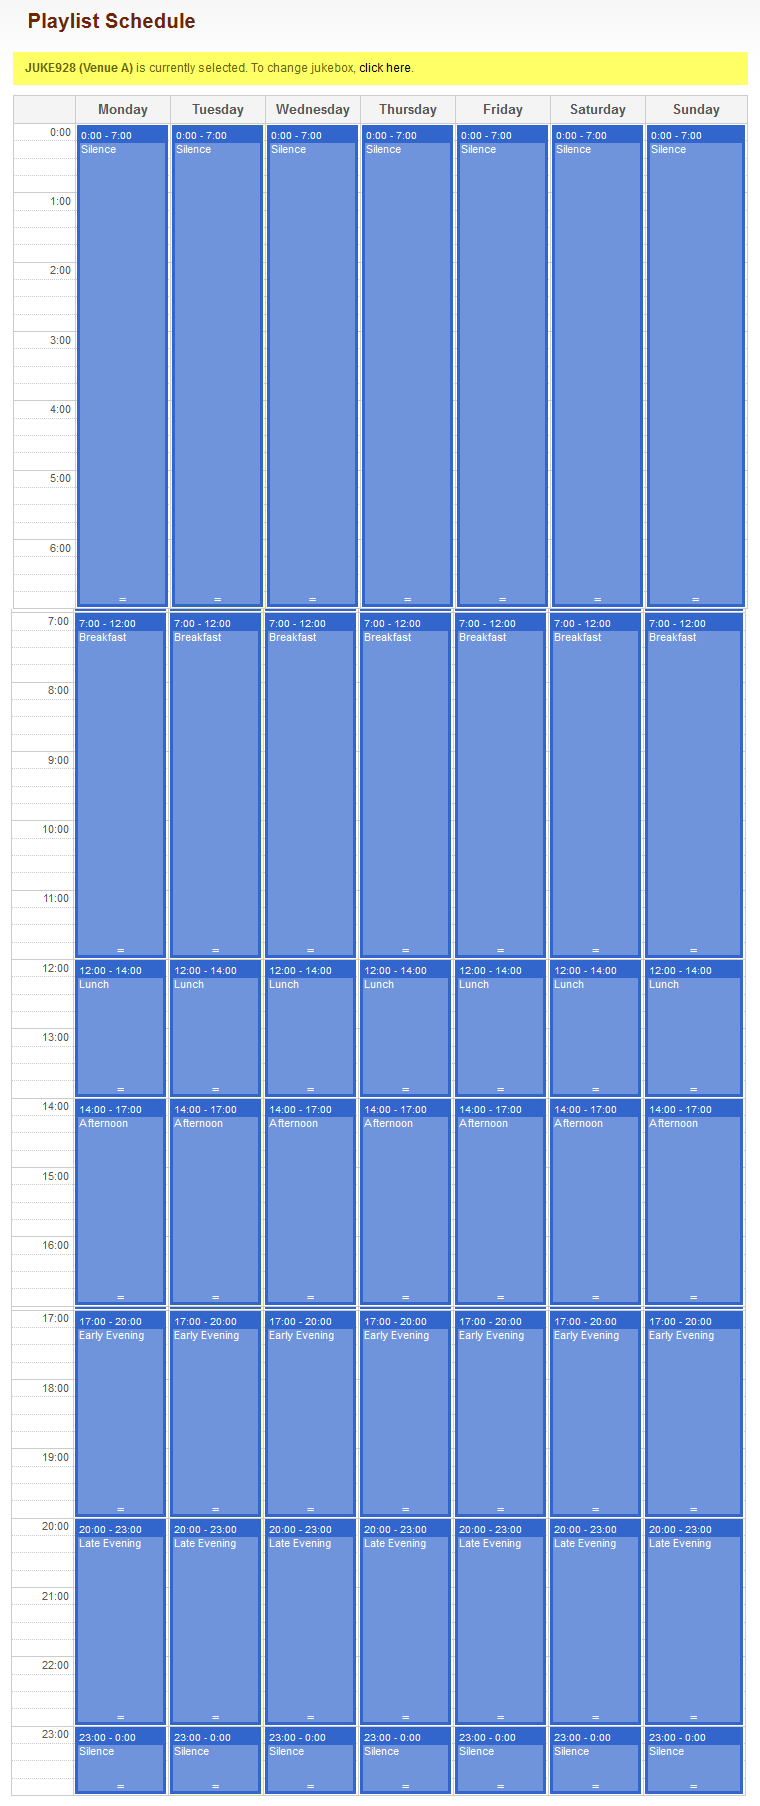
We have created Schedule Blocks for the entire week. In summary, this was to create a demo playlist schedule for each day of the week from Monday until Sunday:
- Breakfast Playlist - playing from 07h00 until 12h00
- Lunch Playlist - playing from 12h00 until 14h00
- Afternoon Playlist - playing from 14h00 until 17h00
- Early Evening Playlist - playing from 17h00 until 20h00
- Late Evening Playlist - playing from 20h00 until 23h00
- No music will be playing from 23h00 until 07h00 the next morning
Additional options available to amend, delete, edit or preview the Playlist in the Schedule Block.

- To change the Playlist of a Schedule Block, single click on the Schedule Block to reveal the Playlist Selection window.
- To select an alternative playlist, make your selection from the Play Playlist drop-down.
- To delete a block, click the Delete button.
- If you decide midway not to make any changes, click on the Cancel button.
- In order to edit the existing playlist, simply click on Edit Playlist and it will take you to the Custom Playlist section.
- You can also preview this playlist by clicking on the Preview button. This will take you to the Custom Playlist section.
- Finally, if you have made changes and are happy with your decision, click on Save.